How to Design a Modern Bedroom? Wooden Nightstands, Decorative Stone, and LED-Backlit Moss

We both work at Deerhorn, so we see furniture, materials, designs, and all kinds of interiors practically every day. This time, however, we want to show you something completely personal— the makeover of our own bedroom.
And even though you might think that, since we work in the furniture industry, designing our own interior would be easier, that wasn’t the case at all 🙂 The concept changed several times, we spent hours looking for inspiration, and some of our best decisions actually came about by chance.
It all started with a previous renovation
A while back, we renovated the stairwell. That’s where we first really focused on natural materials— wood and moss. We really liked that combination because it brought a lot of warmth to the interior and made the space feel cozier.
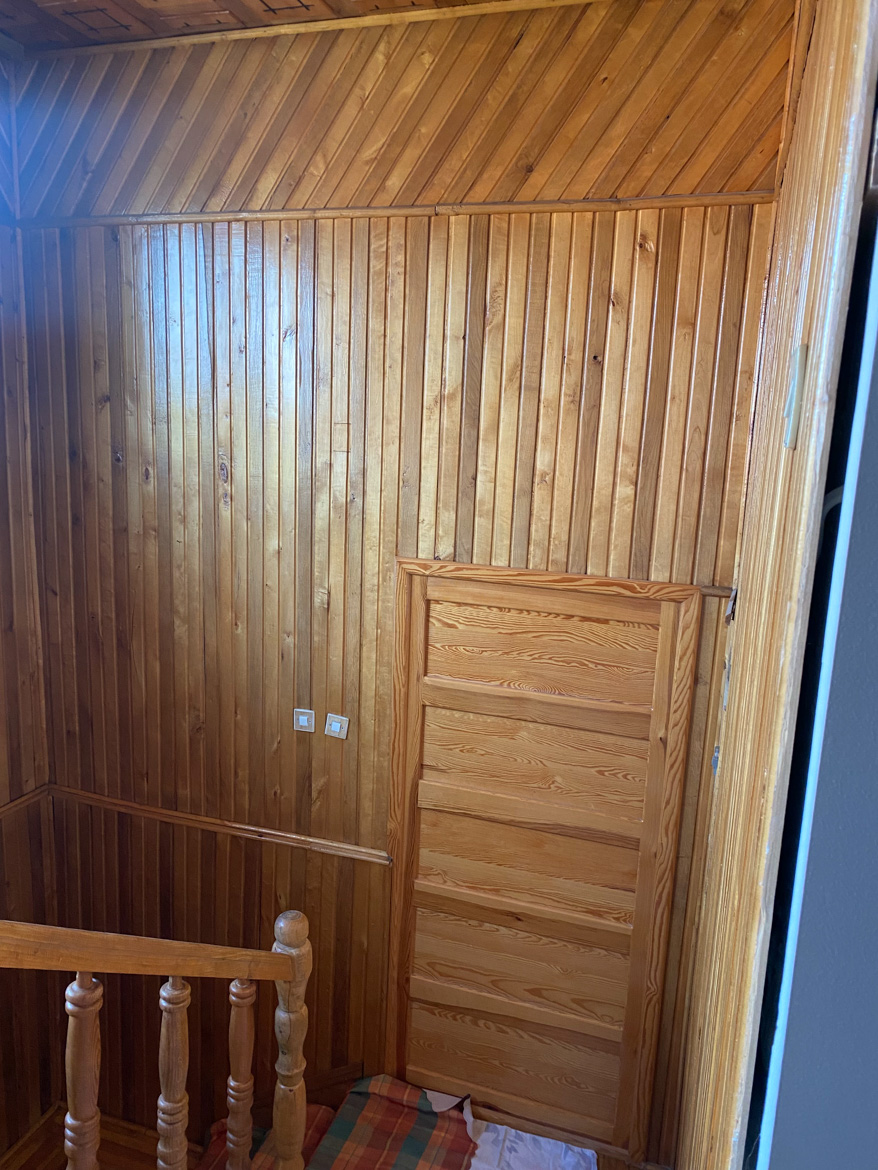
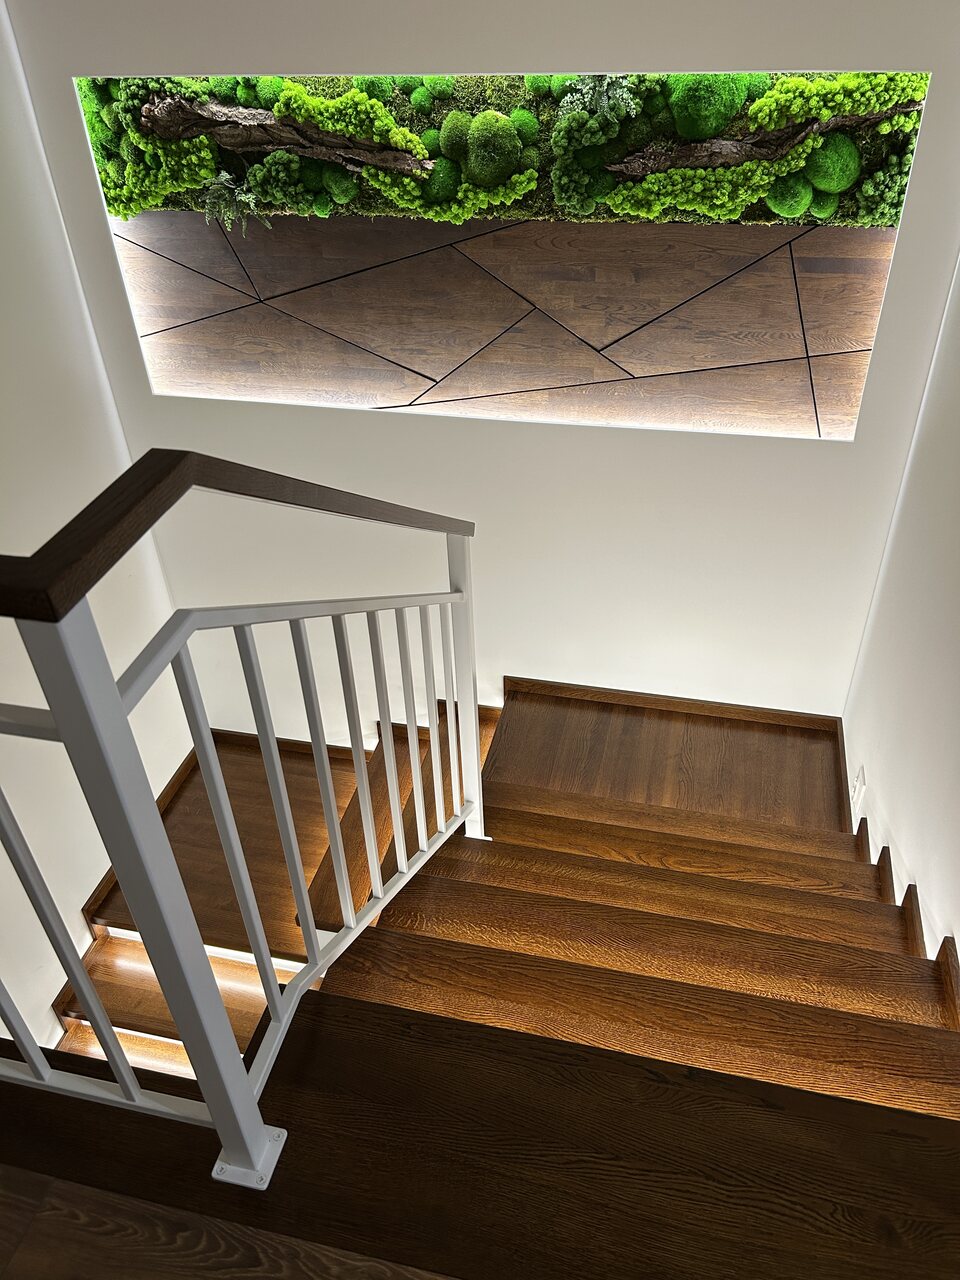
We knew there was one element left—wood
When it came time to design the bedroom, we knew one thing for sure— we didn’t want to repeat what we’d done in the stairwell. The bedroom was supposed to be completely different, but at the same time, it couldn’t look like it belonged in a different house.
So we had to find one element that would tie these interiors together. We chose oak. This time, however, we didn’t want to treat it as just a small accent. It was meant to play a much bigger role and appear on the most important wall in the entire bedroom—behind the bed.
So we already knew what we wanted to use. There was just one problem—we still didn’t know what the wall was actually supposed to look like.
And that’s when the search for inspiration began.
Hours on Pinterest and still no ideas
Then came the part that I think everyone who’s decorating their own home is familiar with— looking for inspiration. We already knew we wanted to use wood and that the wall behind the bed was going to be the focal point of the bedroom. But what exactly was it supposed to look like?
Pinterest was the natural first step. We browsed through various projects, saved photos, and compared different design solutions. In one design, we liked the wall; in another, the lighting, the bed, or the way wood was used. There was just one problem—none of them were what we were looking for.
After many hours, we had a sizeable collection of saved inspiration, but we still didn’t have an idea for our own bedroom. 🙂 We also didn’t want to copy a ready-made interior just because it looked good in a photo.
In the end, we decided that since we couldn’t find the right inspiration, we’d try to create it ourselves. And that’s when we brought ChatGPT into the process.
Did ChatGPT help us design our bedroom?
We began to describe in detail what the bedroom should look like, what materials we wanted to use, and what we definitely wanted to avoid. We created several renderings, but we didn’t come up with the right idea right away. In one, we didn’t like the color scheme; in another, the wall layout wasn’t right, so it took a few attempts and revisions.
Finally, a visualization appeared that made us both say , “This is it—let’s go in this direction.” It showed us not only an idea for the wall and the bed, but also a closet. We didn’t treat it as a finished design, but as a starting point that allowed us to see how all the ideas might look together in a single interior.
From that point on, we were able to move from inspiration to planning specific solutions. We already had the inspiration. Now came the harder task—bringing it from the screen into a real bedroom.
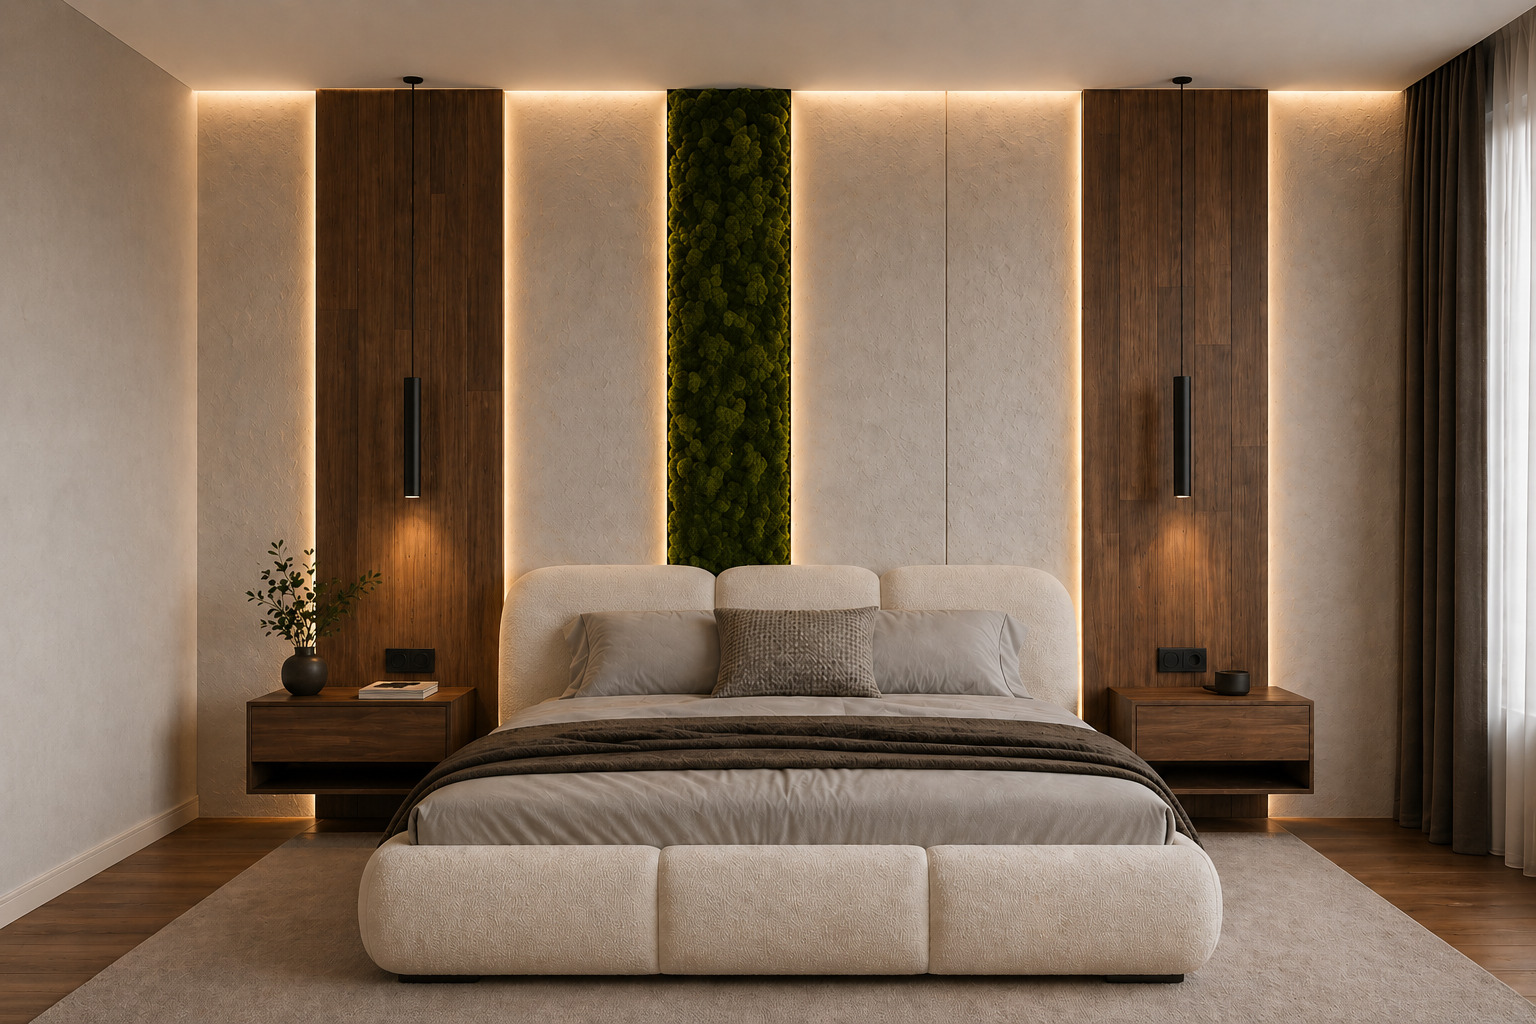
The wall behind the bed couldn’t be ordinary
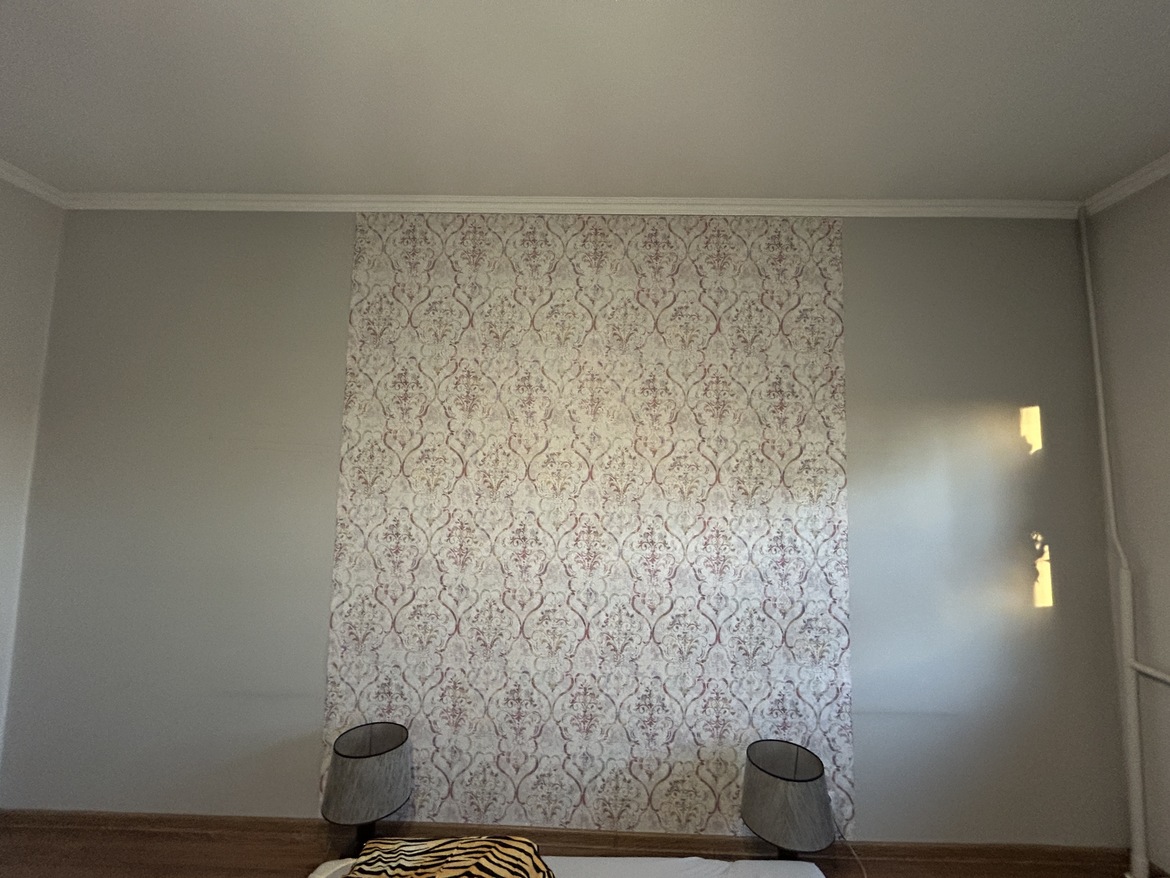
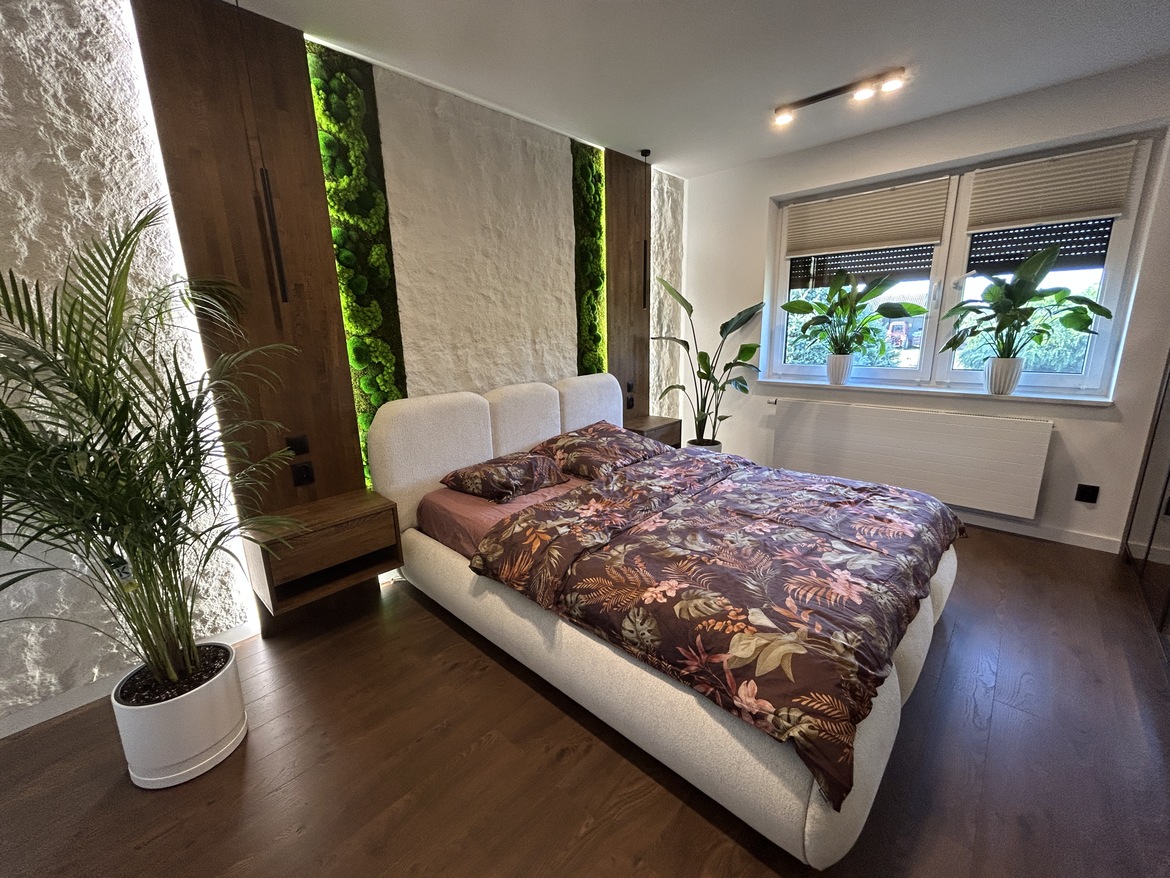
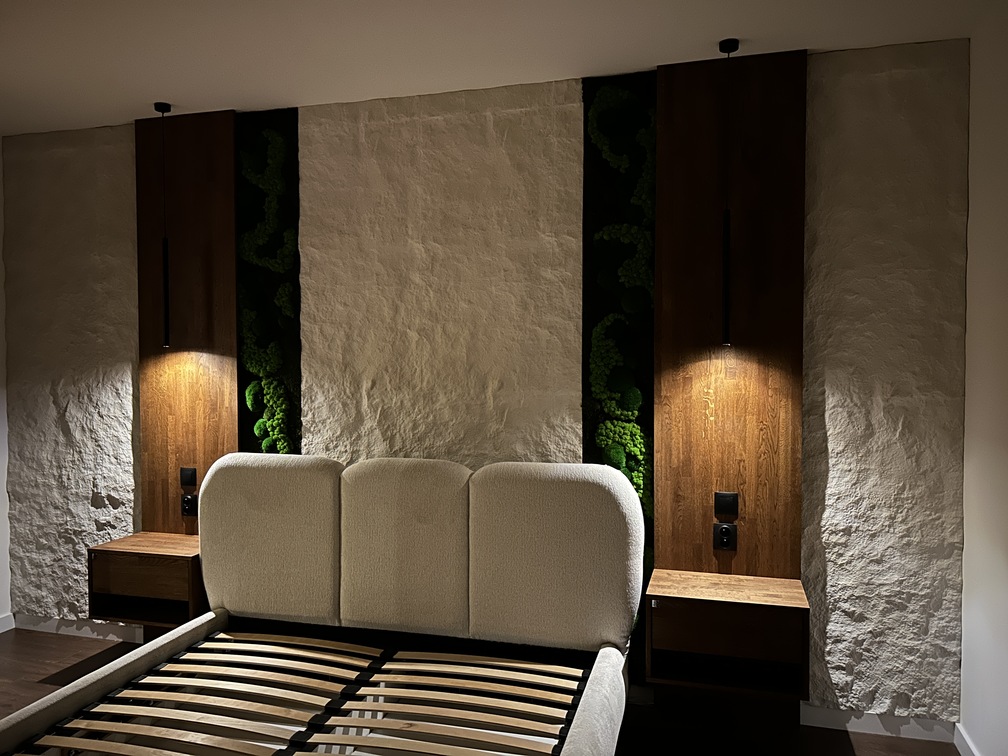
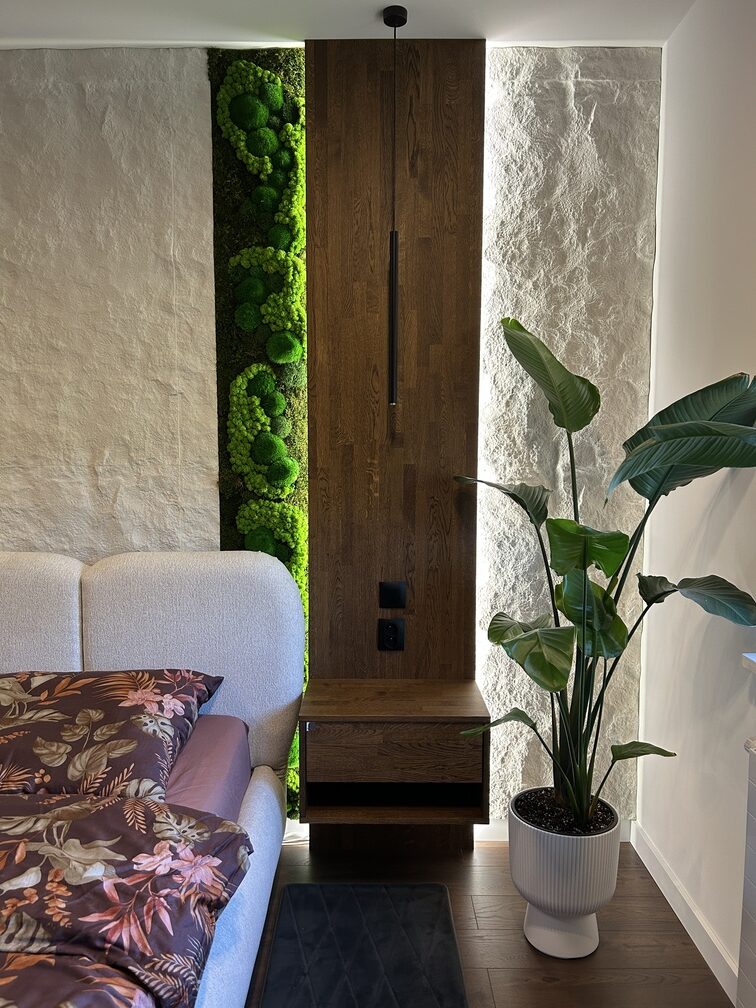
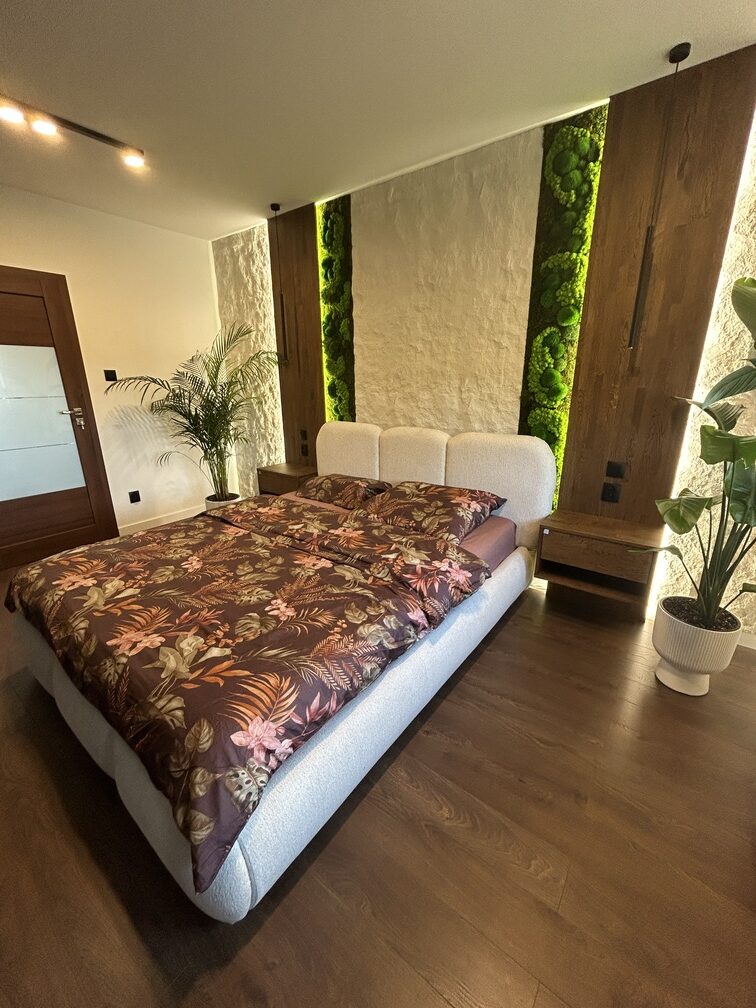
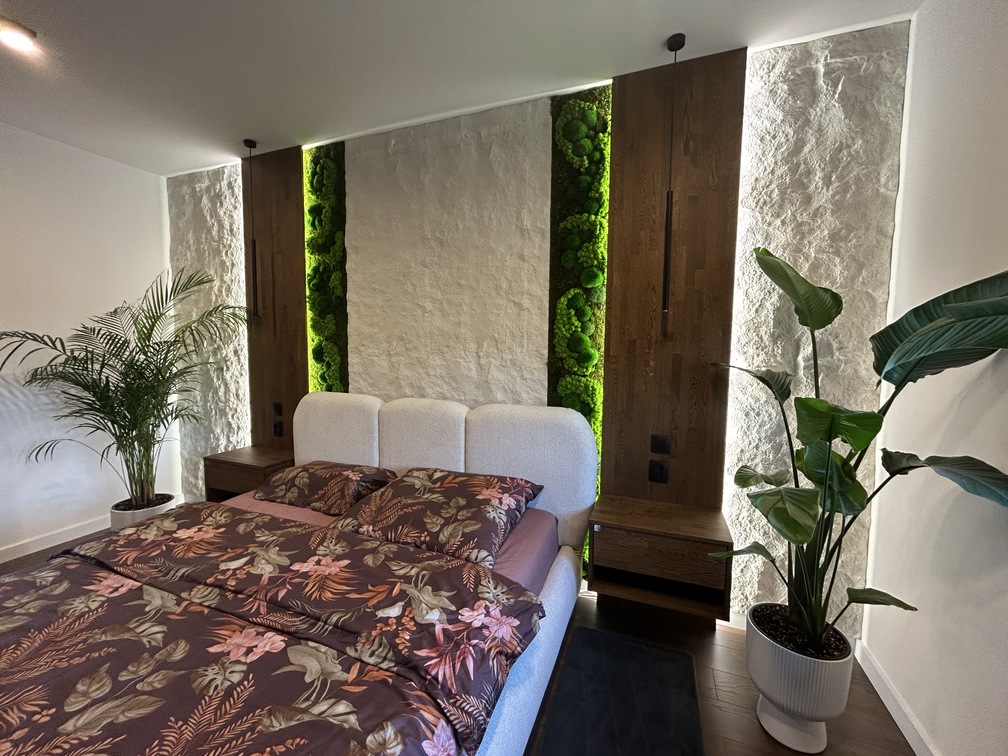
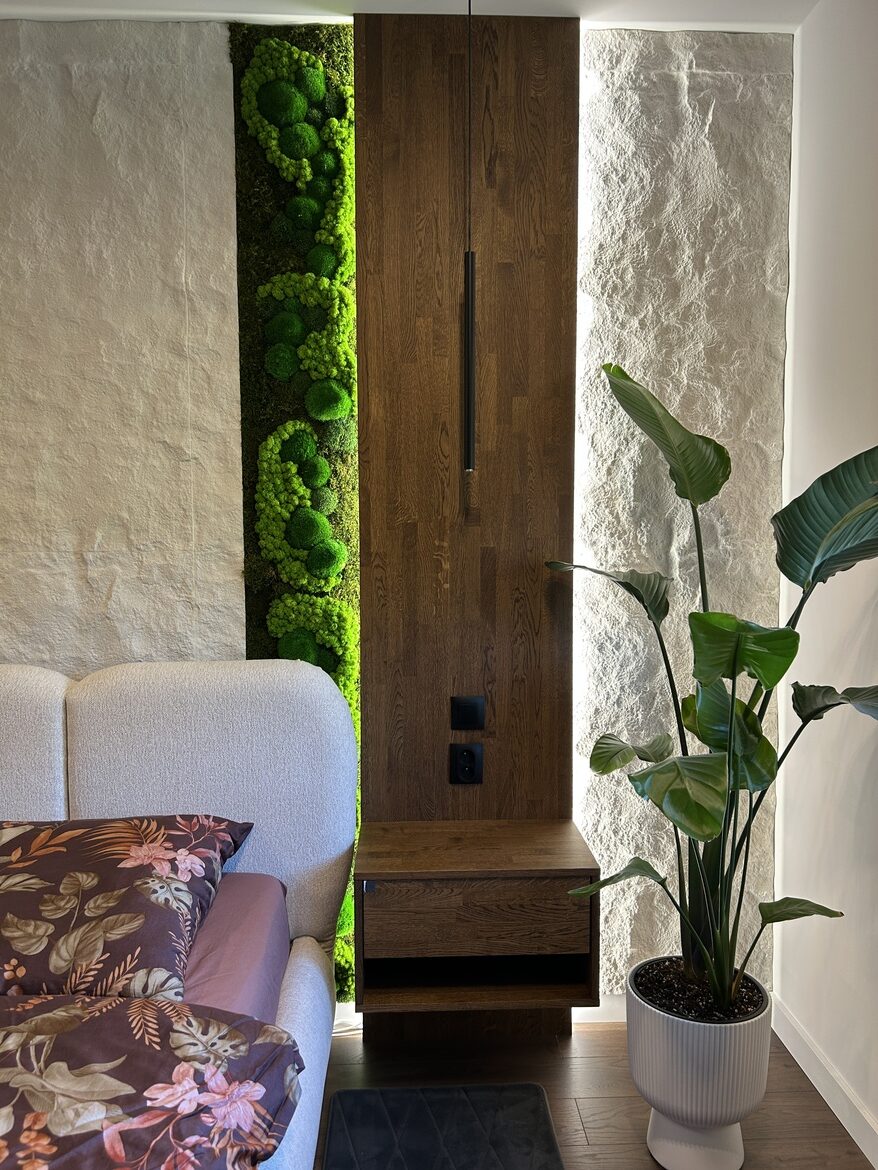
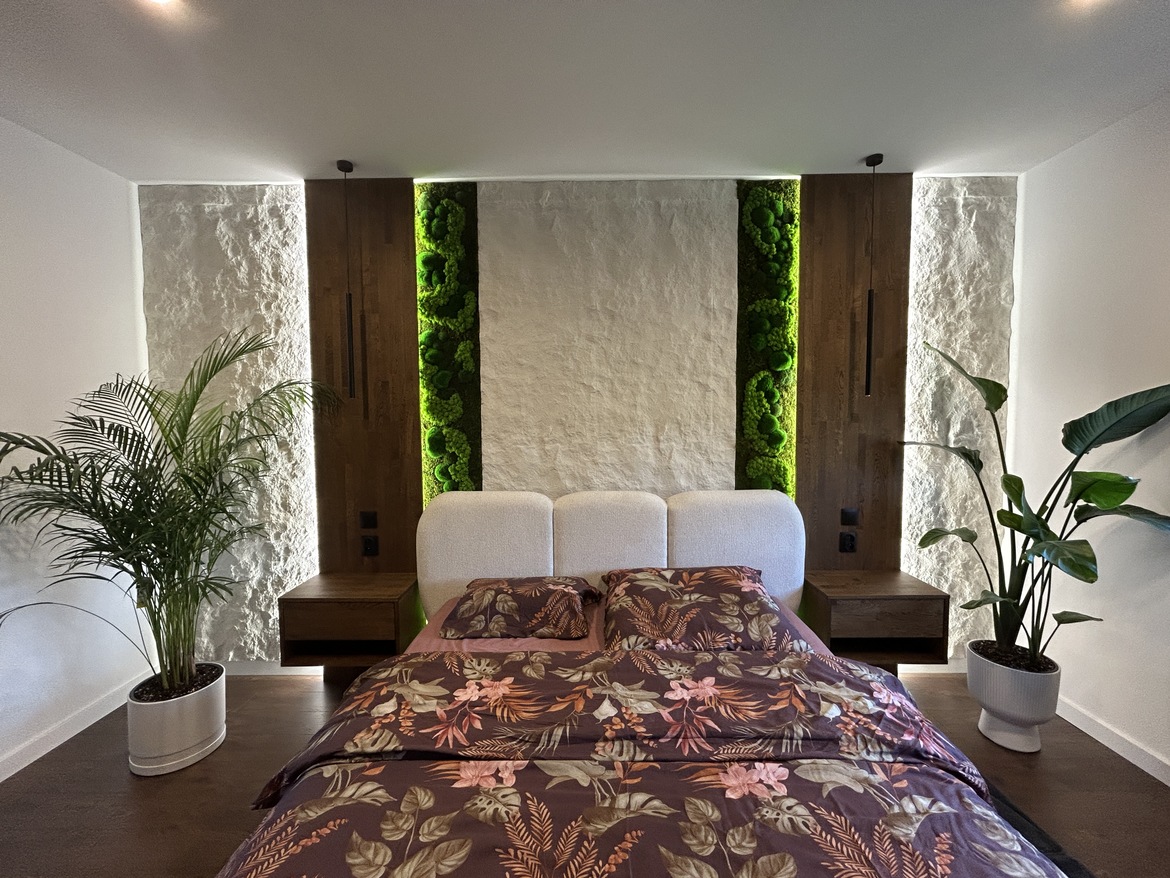
Once we had decided on the overall look of the bedroom, it was time to tackle its most important element— the wall behind the bed. We didn’t want just a plain painted surface or yet another wallpaper, so we opted for a drywall structure, which added depth to the wall and allowed us to create a more interesting composition.
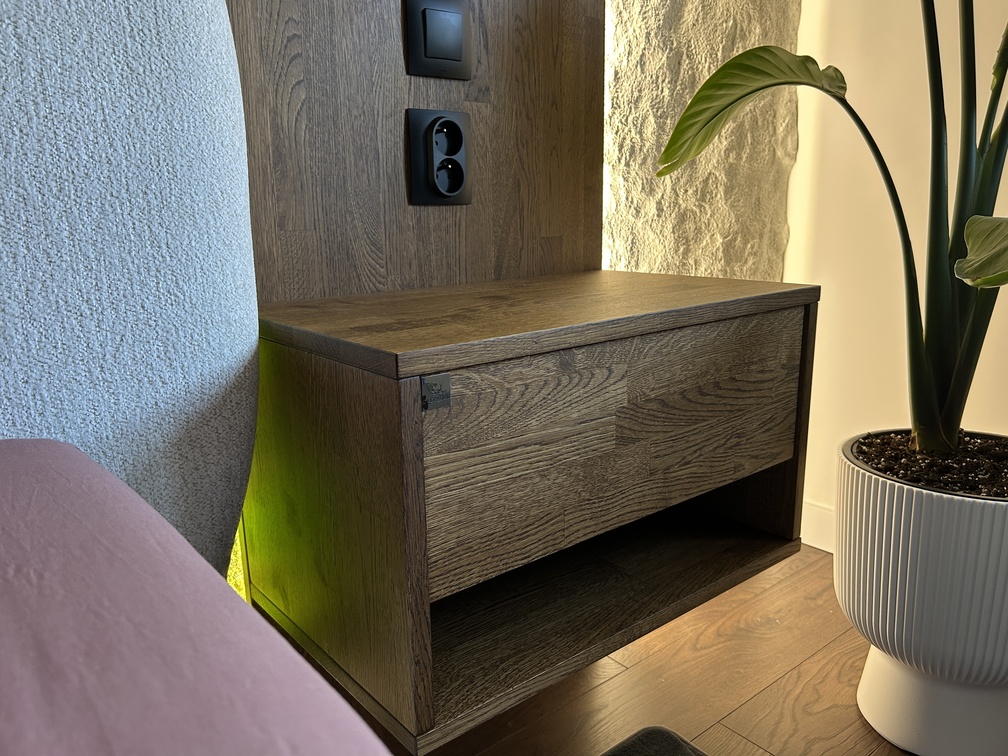
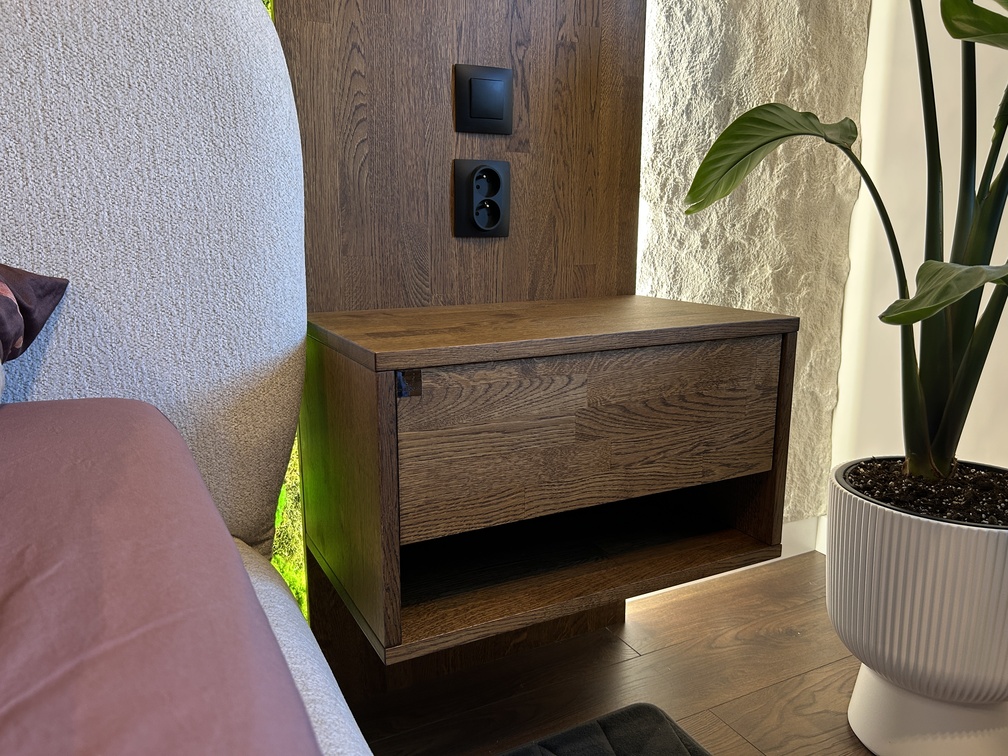
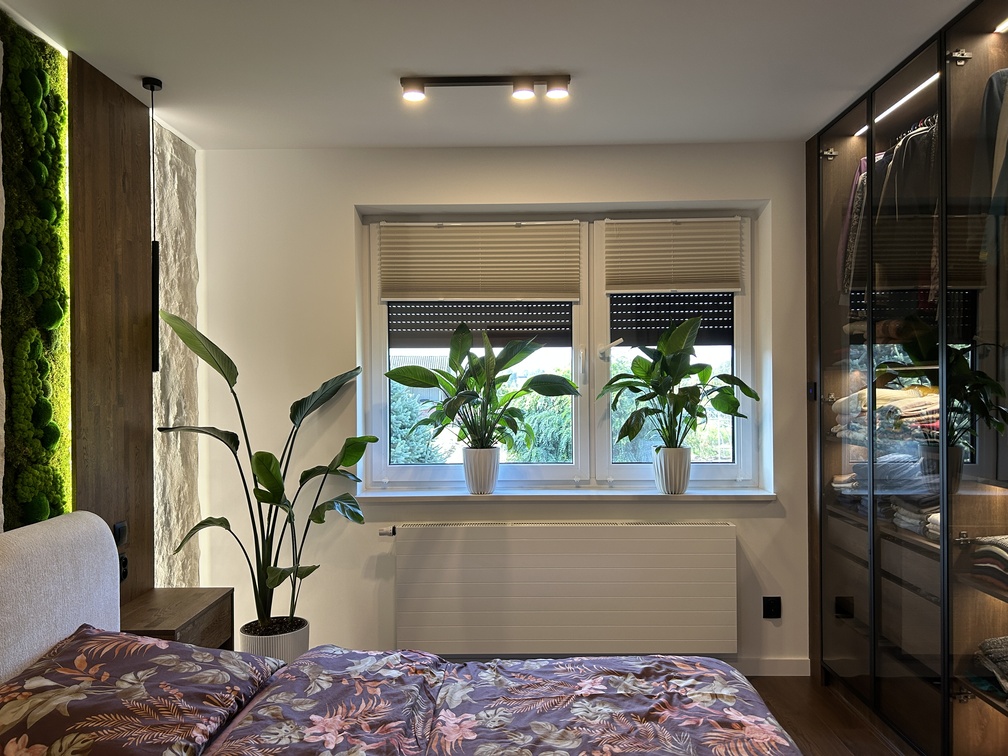
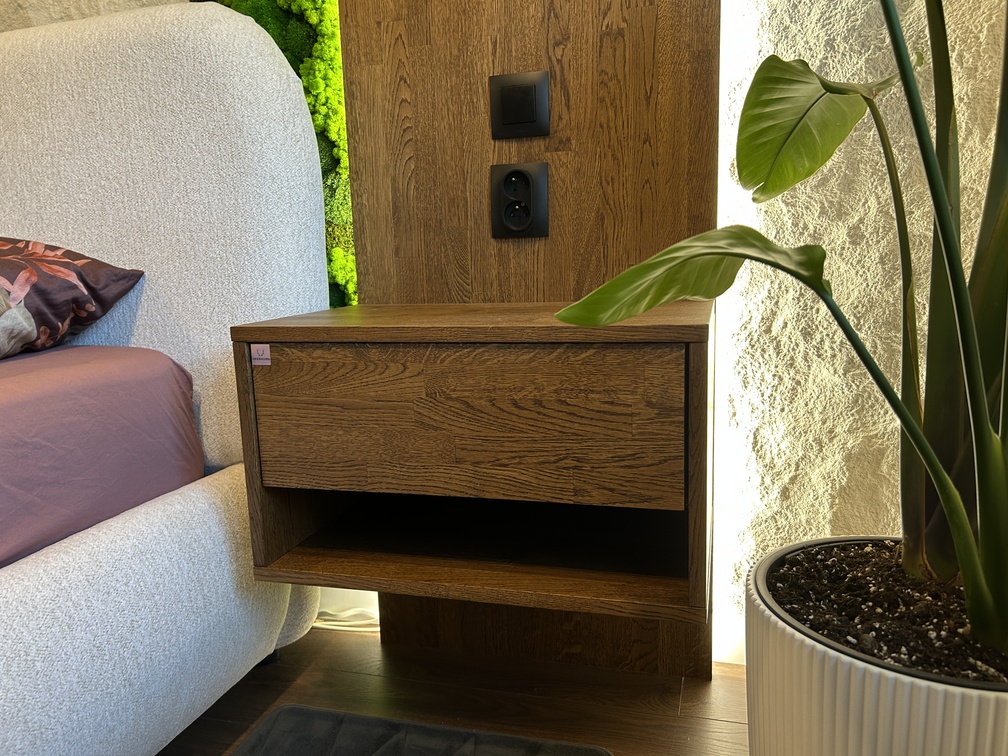
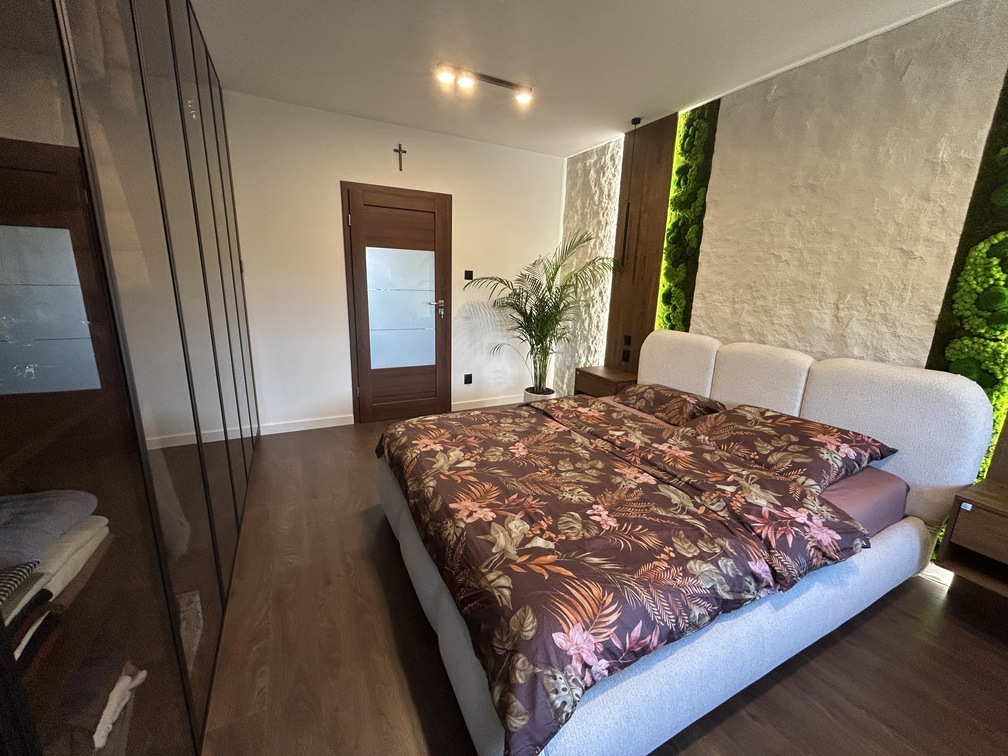
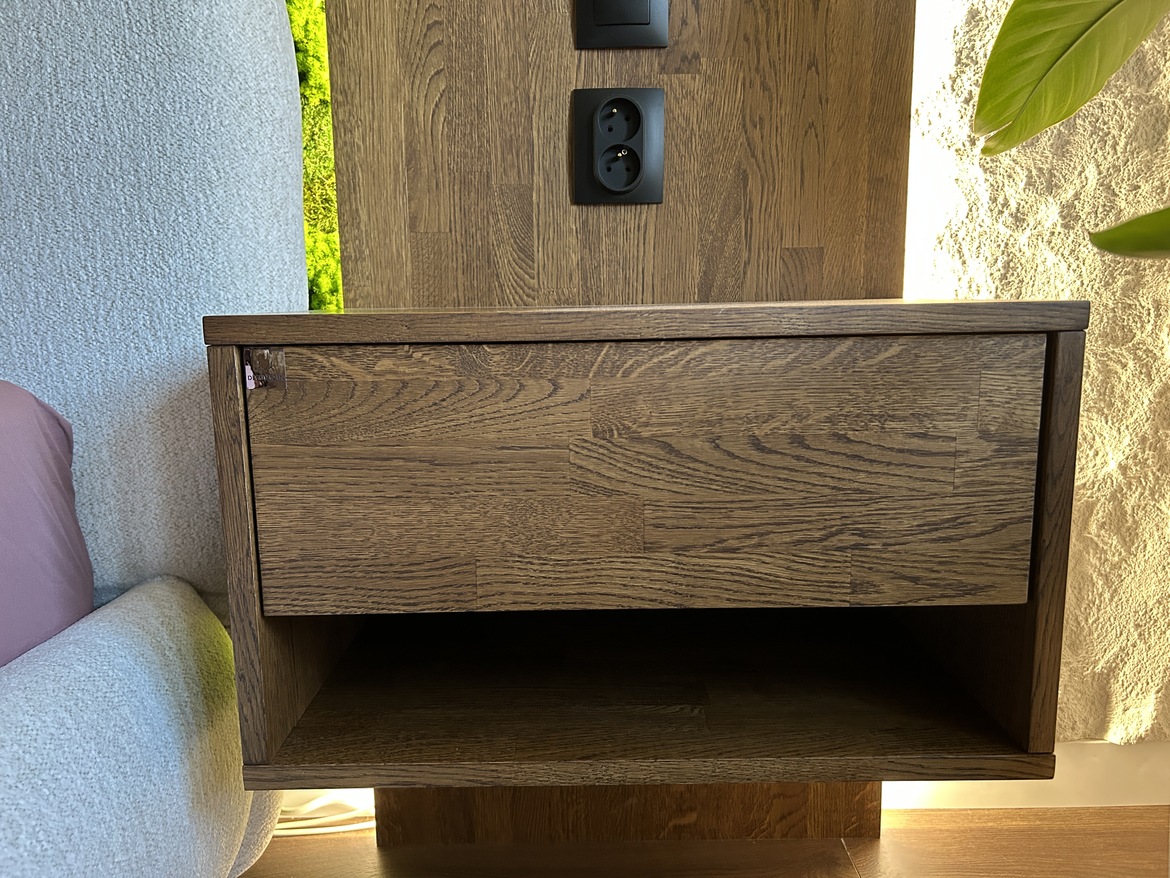
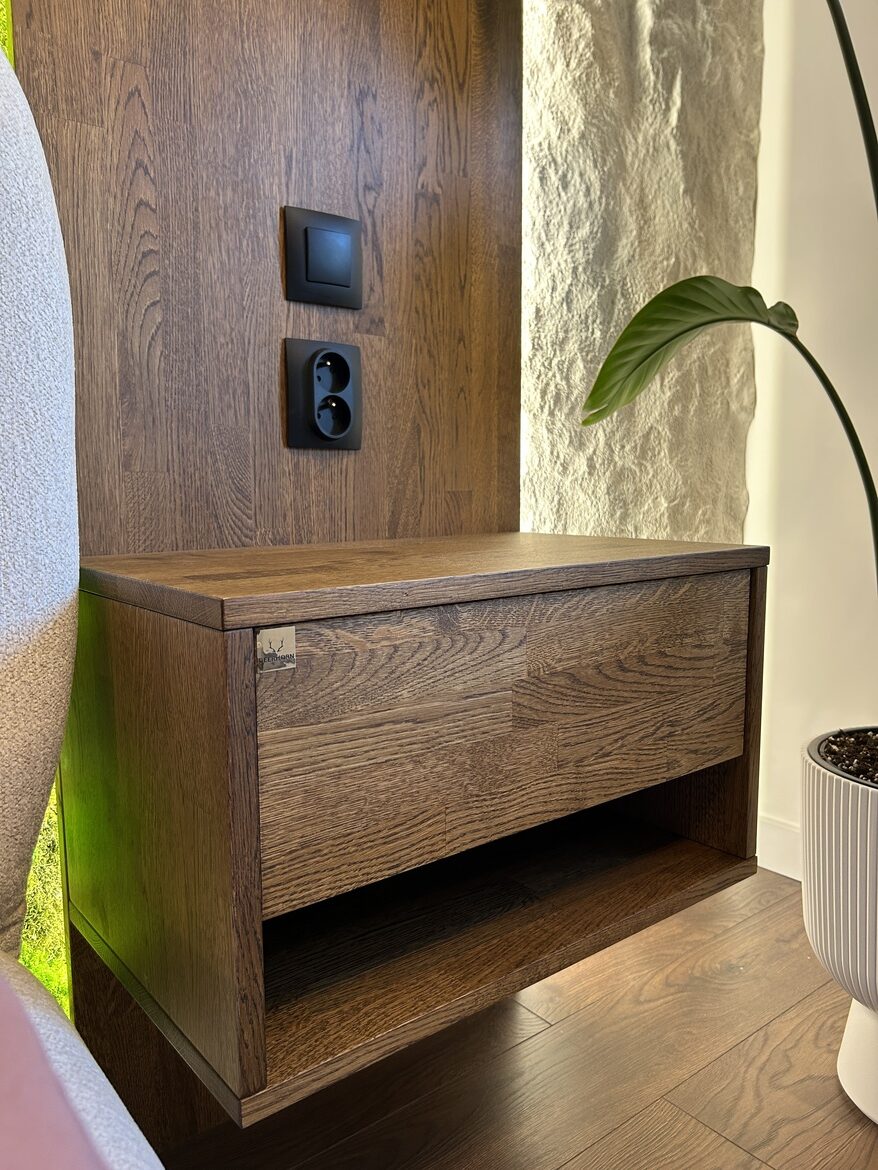
Oak wood was chosen as the primary material, echoing the rest of the house. We combined two oak panels with the nightstands on either side of the bed, so that all the elements would come together as a single whole.
But before we could start cutting the wood and marking out the spots for the cabinets, we needed to know one crucial measurement—the width of the bed. And that’s when our search began all over again.
How did we choose a bed for our bedroom design?
The rendering that served as our main inspiration featured a large upholstered bed with a high headboard. We really liked how it looked paired with wood, so we started looking for a similar model.
The thing is, this time we couldn’t base our decision solely on appearance. The bed was supposed to fit exactly between the nightstands we had set up on either side. Its width, therefore, affected practically the entire wall arrangement.
First, we had to find the right model, carefully check its dimensions, and only then could we finally determine the remaining distances.
Why did a few centimeters make such a big difference here?
It was one of those moments during the renovation when it would have been easiest to say, “It’ll fit somehow.” Except that “somehow” just wasn’t an option here.
We had to precisely determine the width of the bed and headboard, the placement of both nightstands, the width of the wooden elements, the space for the moss, and the locations where the lamps would later be placed. Everything depended on everything else.
A difference of a few centimeters by the bed would mean moving the nightstands, and with them, the woodwork and lighting. That’s why we measured and checked everything several times before making the first cut.
In the end, every piece fell exactly into place. The bed fit between the cabinets, the wood was ready, but there was still one decision left to make—would moss make a comeback in the bedroom?
How did we combine wood, moss, and lighting in the bedroom?
Here we faced a slightly bigger dilemma. We’d already used moss during a previous renovation of the stairwell, so at first we assumed we’d skip it in the bedroom. We didn’t want another room to look like a repeat of the same idea. On the other hand, we really liked the combination of natural green and oak.
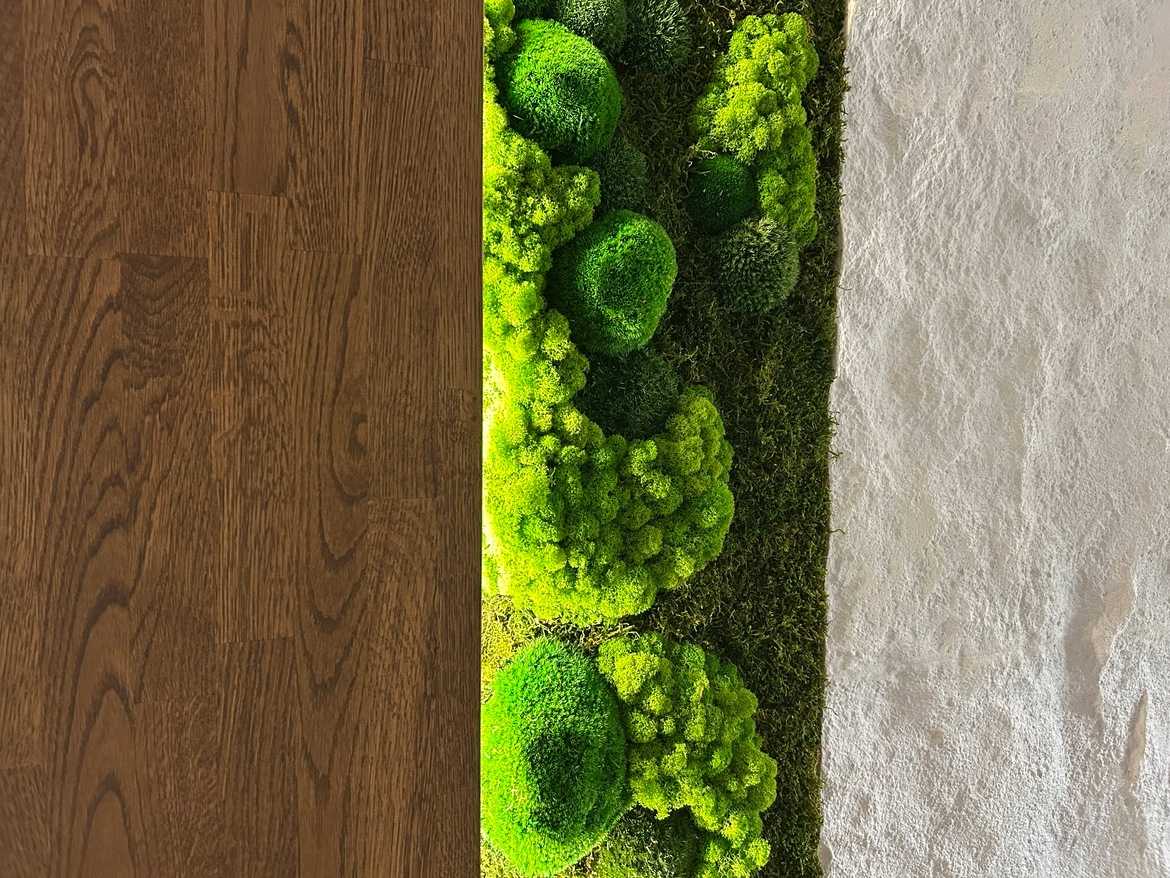
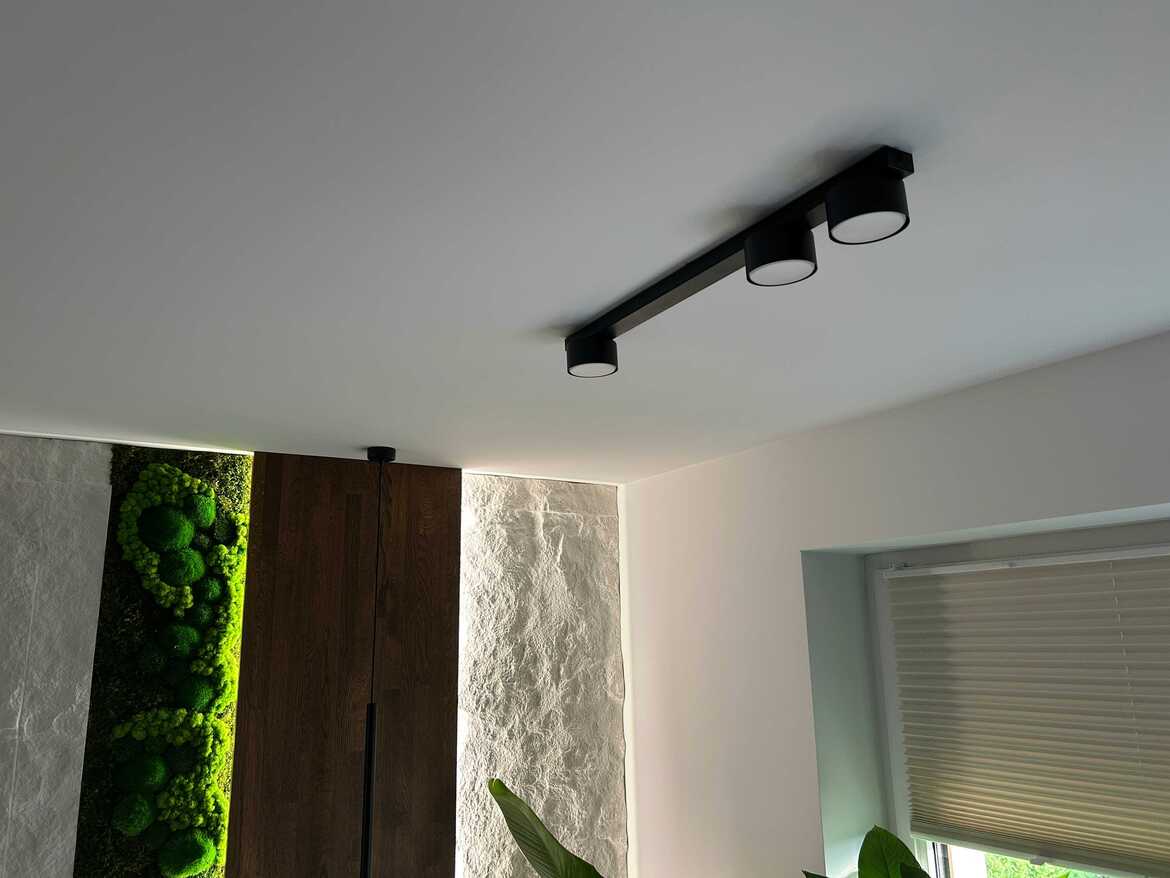
Ultimately, we came to the conclusion that the problem isn’t the moss itself, but how it’s used. Instead of turning it into a large wall decoration, we treated it as a small accent among the other elements of the interior. This way, it complements the staircase without dominating the bedroom.
How does the lighting change the wall behind the bed in the evening?
During the day, the wood, the light-colored bed, and the wall structure itself are the most noticeable features. In the evening, however, the light takes center stage.
We wanted to make sure the bedroom didn’t have just one bright light that illuminated the entire room. That’s why we added small lamps next to the bed. Their placement was also planned in advance so they would be exactly where they’re most convenient when lying in bed.
When turned on, they make the bedroom feel much cozier, and the light further highlights the texture of the wood and moss.
How did we choose the flooring for our new bedroom design?
The next step was the floor. Here, the plan seemed simple. We wanted to find flooring that matched the panels we already had in the other rooms, to maintain a sense of continuity throughout the house.
That’s the theory, anyway.
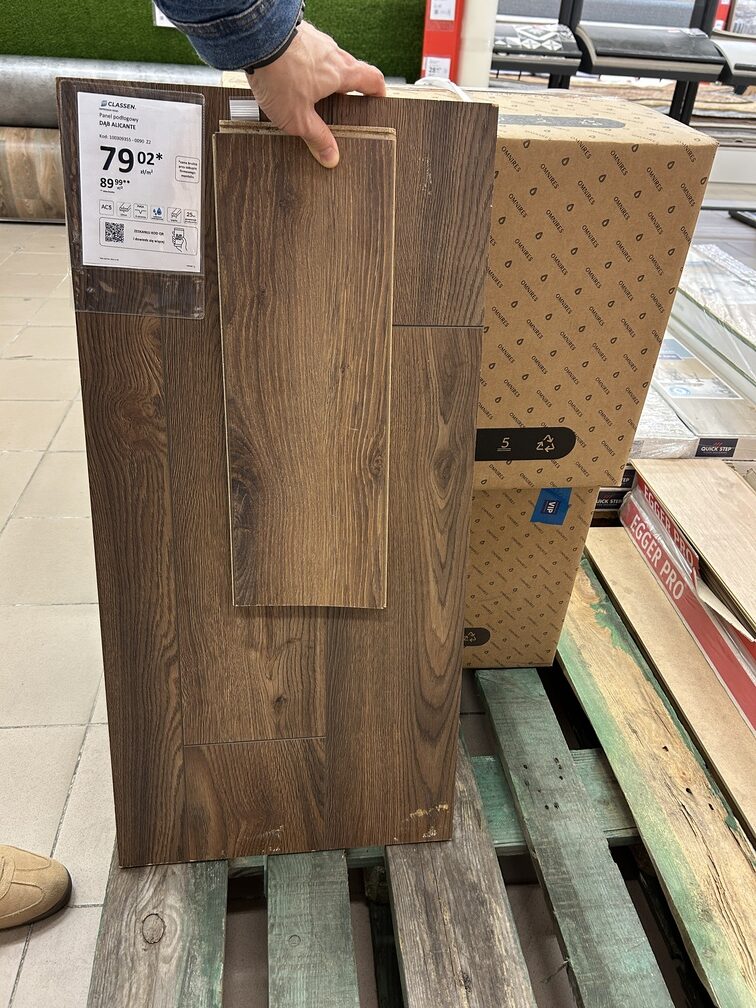
Once it was installed, we realized that the new floor was much darker than we had expected. At first, we were a little surprised, but as more pieces were added to the room, we began to see the color in a completely different light.
The darker floor provides a great backdrop for the light-colored upholstered bed. At the same time, it complements the oak and the darker accents found throughout the bedroom.
In the end, things turned out differently than we had planned, but we’re both very happy with this choice. What’s more, it later turned out that the color of the floor would also influence our choice of cabinet finish.
Why did we decide to get a custom-built closet?
At one point, it actually seemed like the renovation was almost finished. The wall behind the bed was finished, the wood and moss were in place, the lights were hanging where they should be, the floor was laid, and the upholstered bed stood between the cabinets.
Compared to how it looked before the renovation, the difference was enormous. And yet, as we looked around the entire room, we still had the feeling that something was missing.
The answer was obvious— wardrobes.
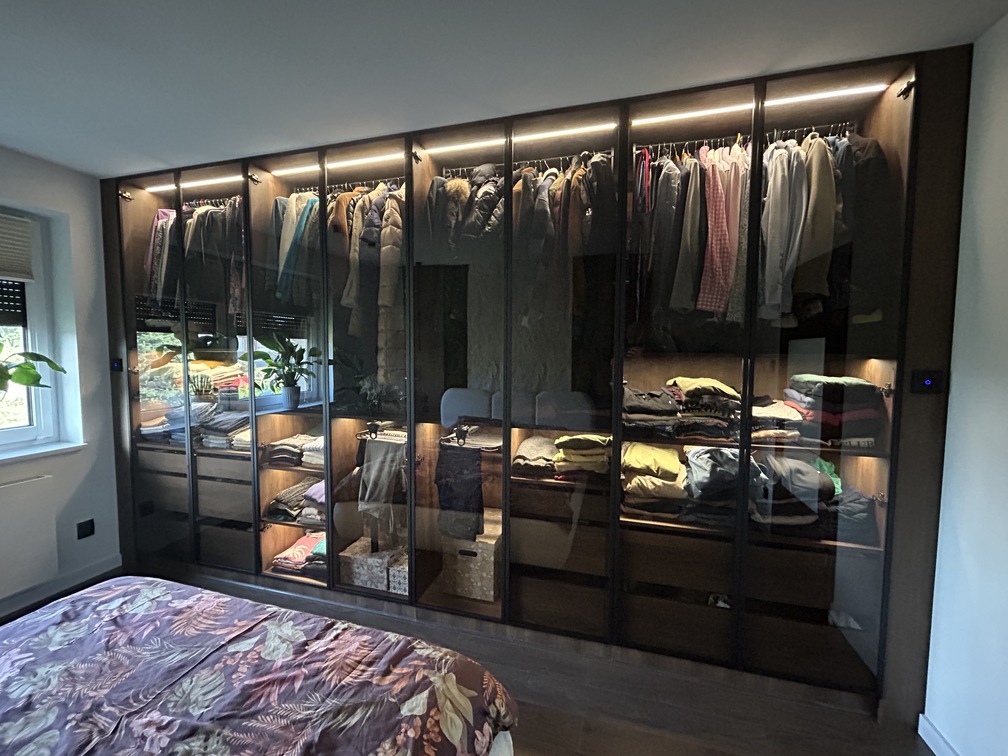
We didn’t want to just buy the first ready-made model that would fit in the available space. We already had experience with our previous closet, so we knew exactly which features were convenient, what we were missing, and what we wanted to do differently this time.
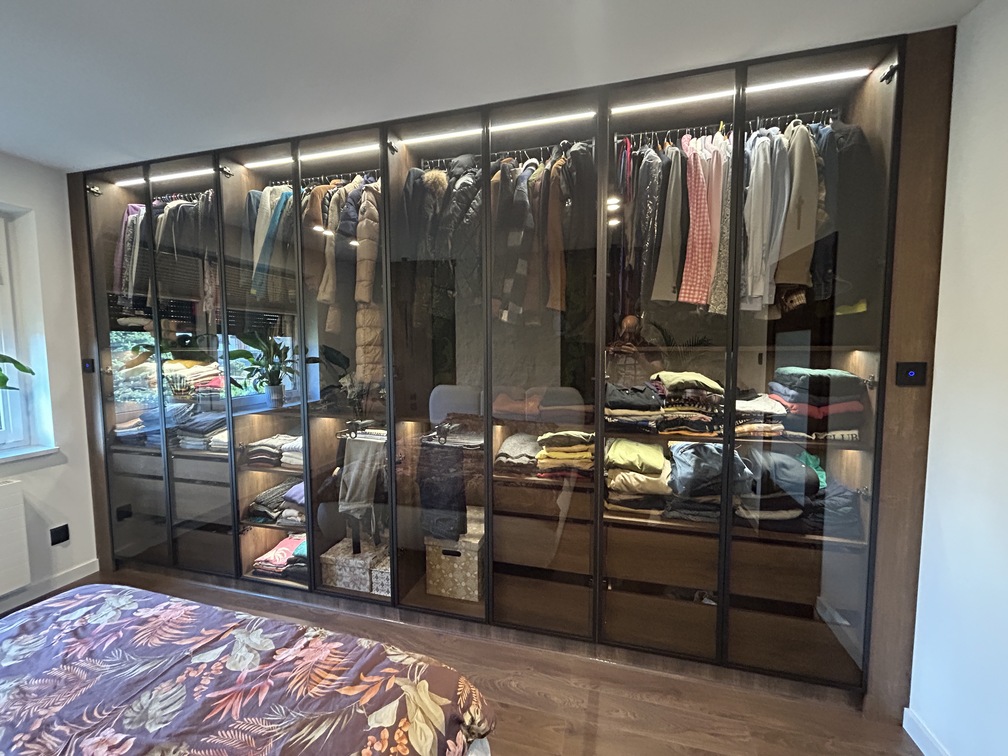
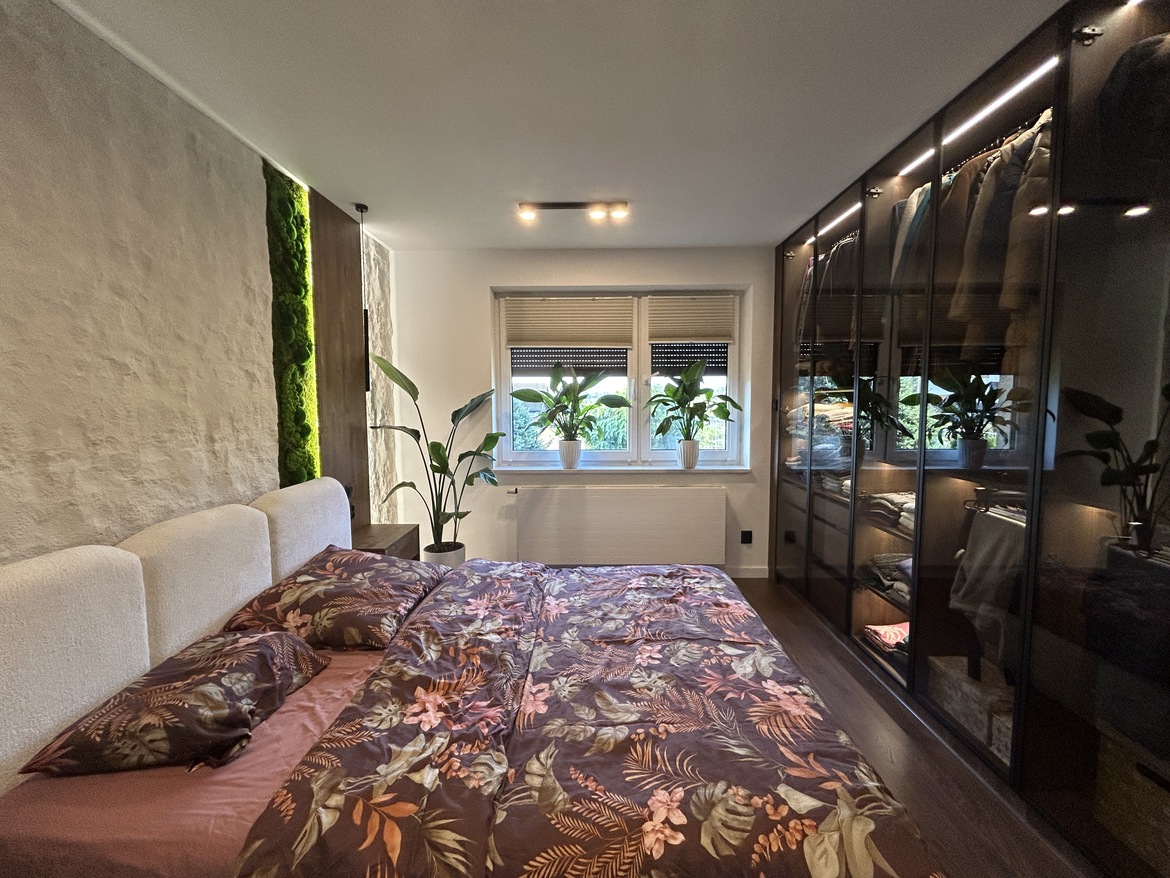
A wardrobe that spans the entire width of the room – maximizing space
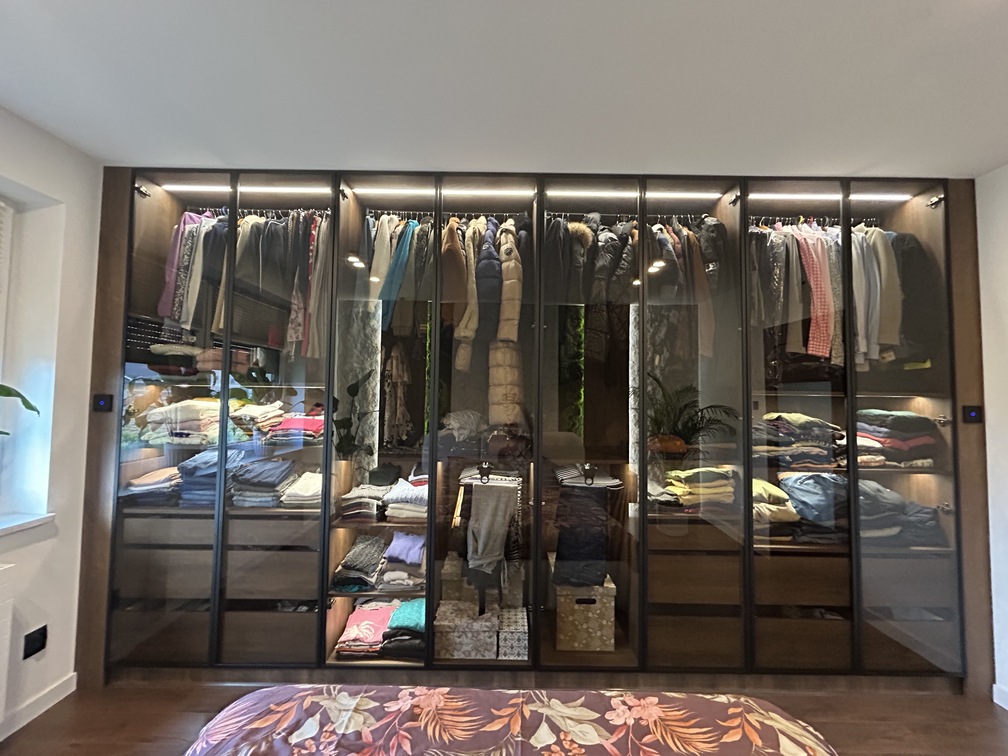
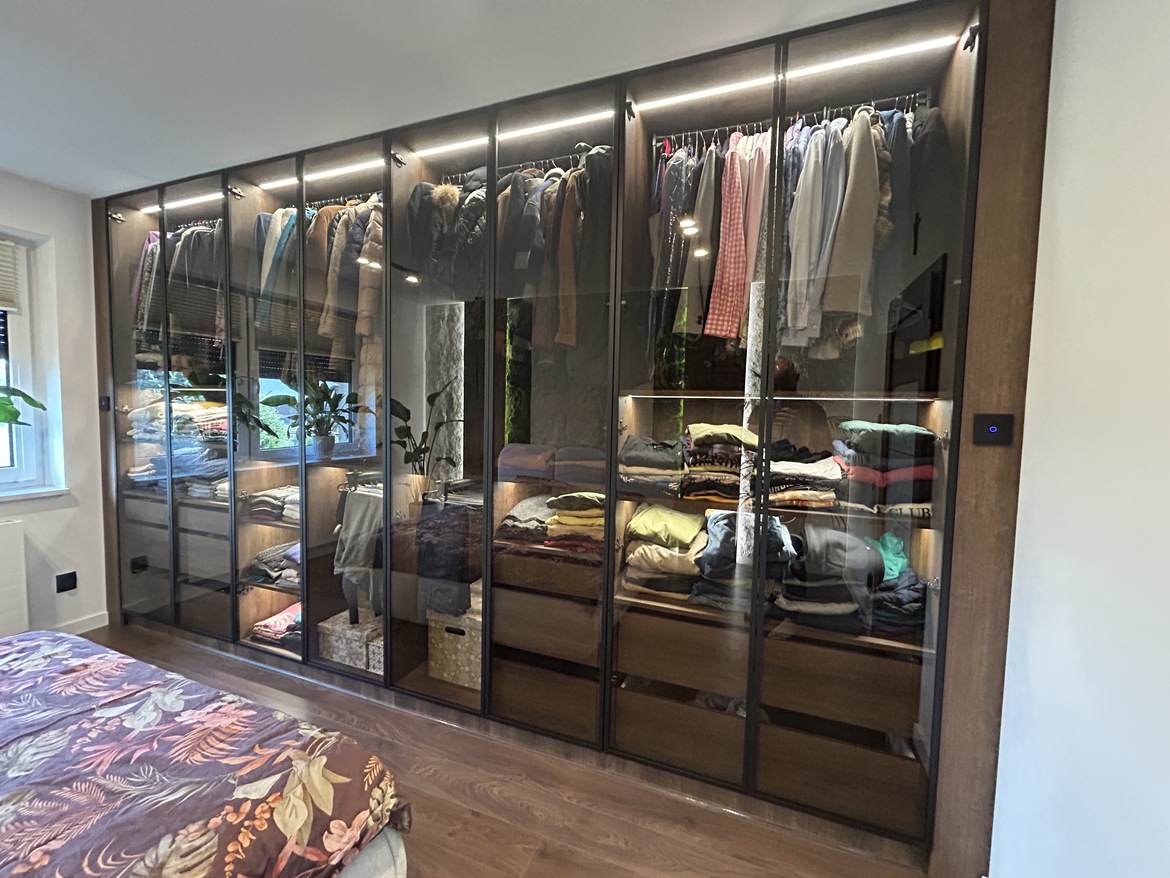
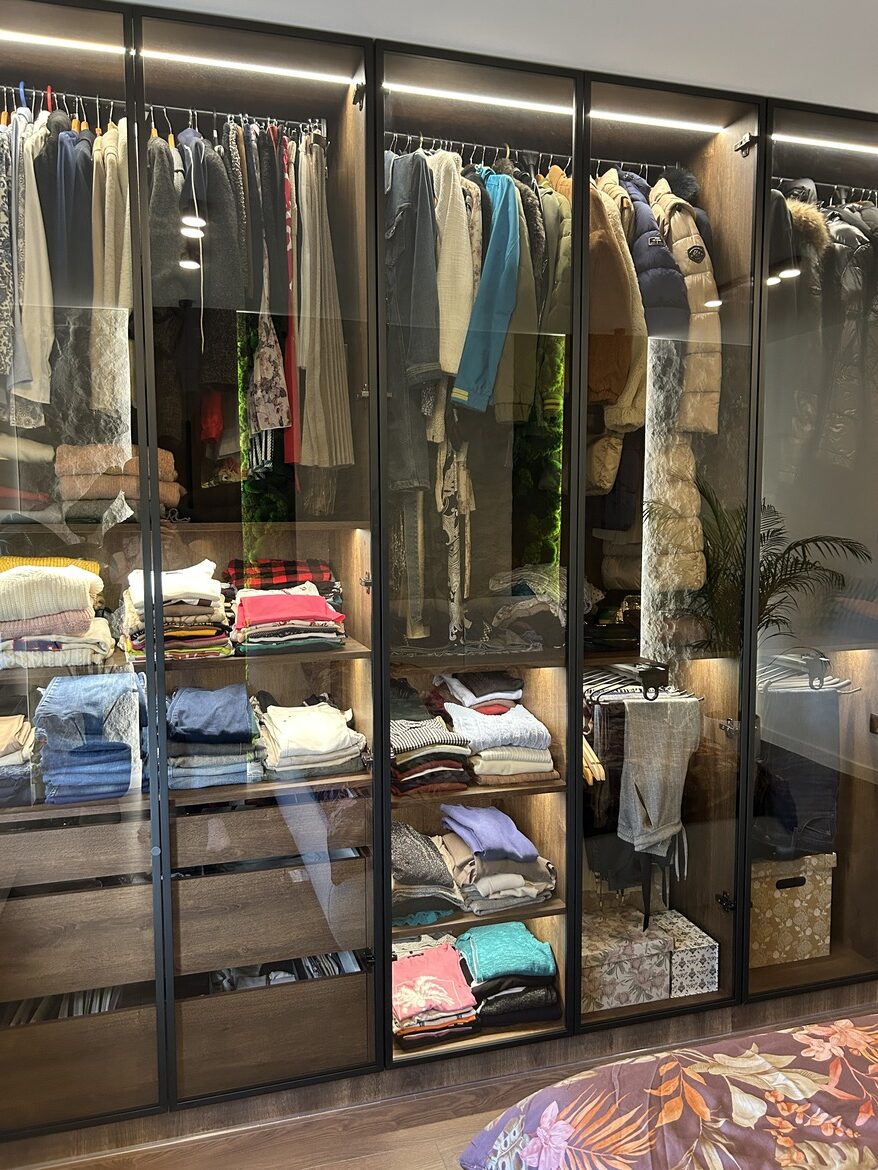
One decision was made very quickly: the closet was to take up practically the entire width of the room.
We didn’t want to leave empty sections of wall on the sides or waste space that could have been used for storage.
The large cabinet also allowed us to plan its interior more effectively. The goal wasn’t simply to create the largest possible closet. What mattered more to us was being able to use it comfortably every day.
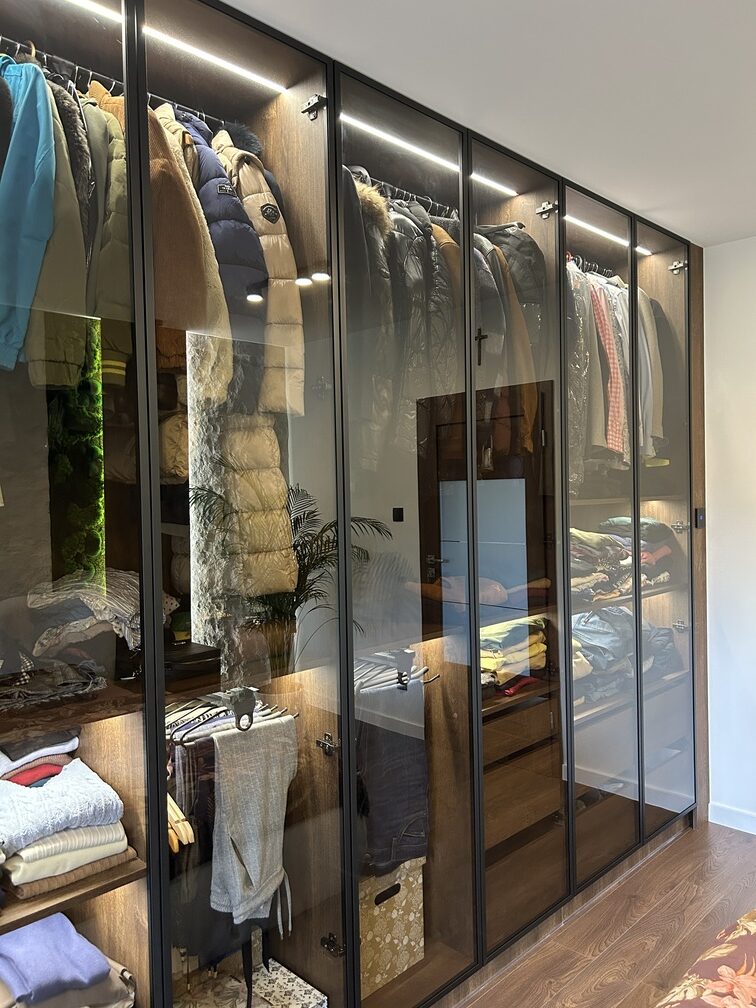
The interior now features shelves, drawers, and pull-out units. It also includes LED interior lighting, glass doors with black frames, and the TIP-ON opening system.
Why did we use pantographs in the cabinet?
In tall closets, a standard rod mounted very high up isn’t always a convenient solution. A pantograph allows you to use the upper part of the closet to store clothes on hangers, while also lowering the rod when you want to access them.
This also means that even the space high up can be used normally on a daily basis, rather than just for storing items that are used only once in a while.
We actually chose the color of the cabinet panels by chance
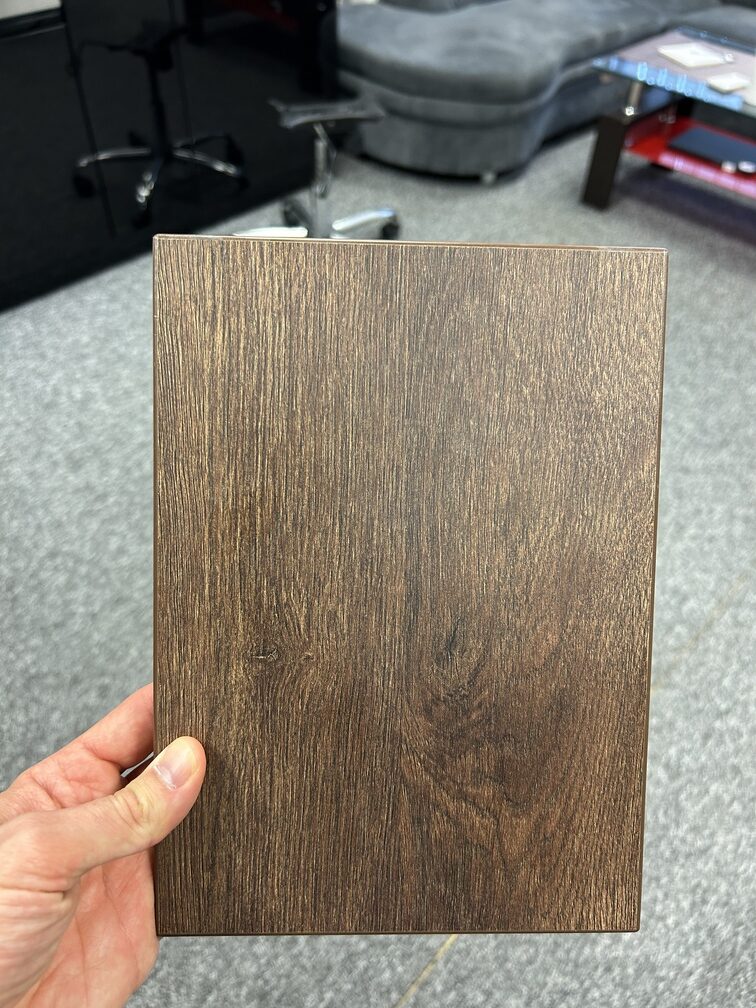
We’d actually already picked out the color for the closet, and the matter seemed settled. However, while browsing through the available finishes, we started looking at other options as well and, quite by accident, came across yet another shade. We hadn’t considered it before. We held the sample up against the floor and found that it matched it much better than the finish we’d chosen at the beginning.
So the first choice very quickly became obsolete. 🙂
The new color complements the darker floor well, without competing with the oak on the wall behind the bed. Once all the details were finalized, all that was left was to order the custom cabinetry. After a dozen or so days, the installation crew arrived, all the pieces were put in place, and only then could we say that the bedroom was truly finished.
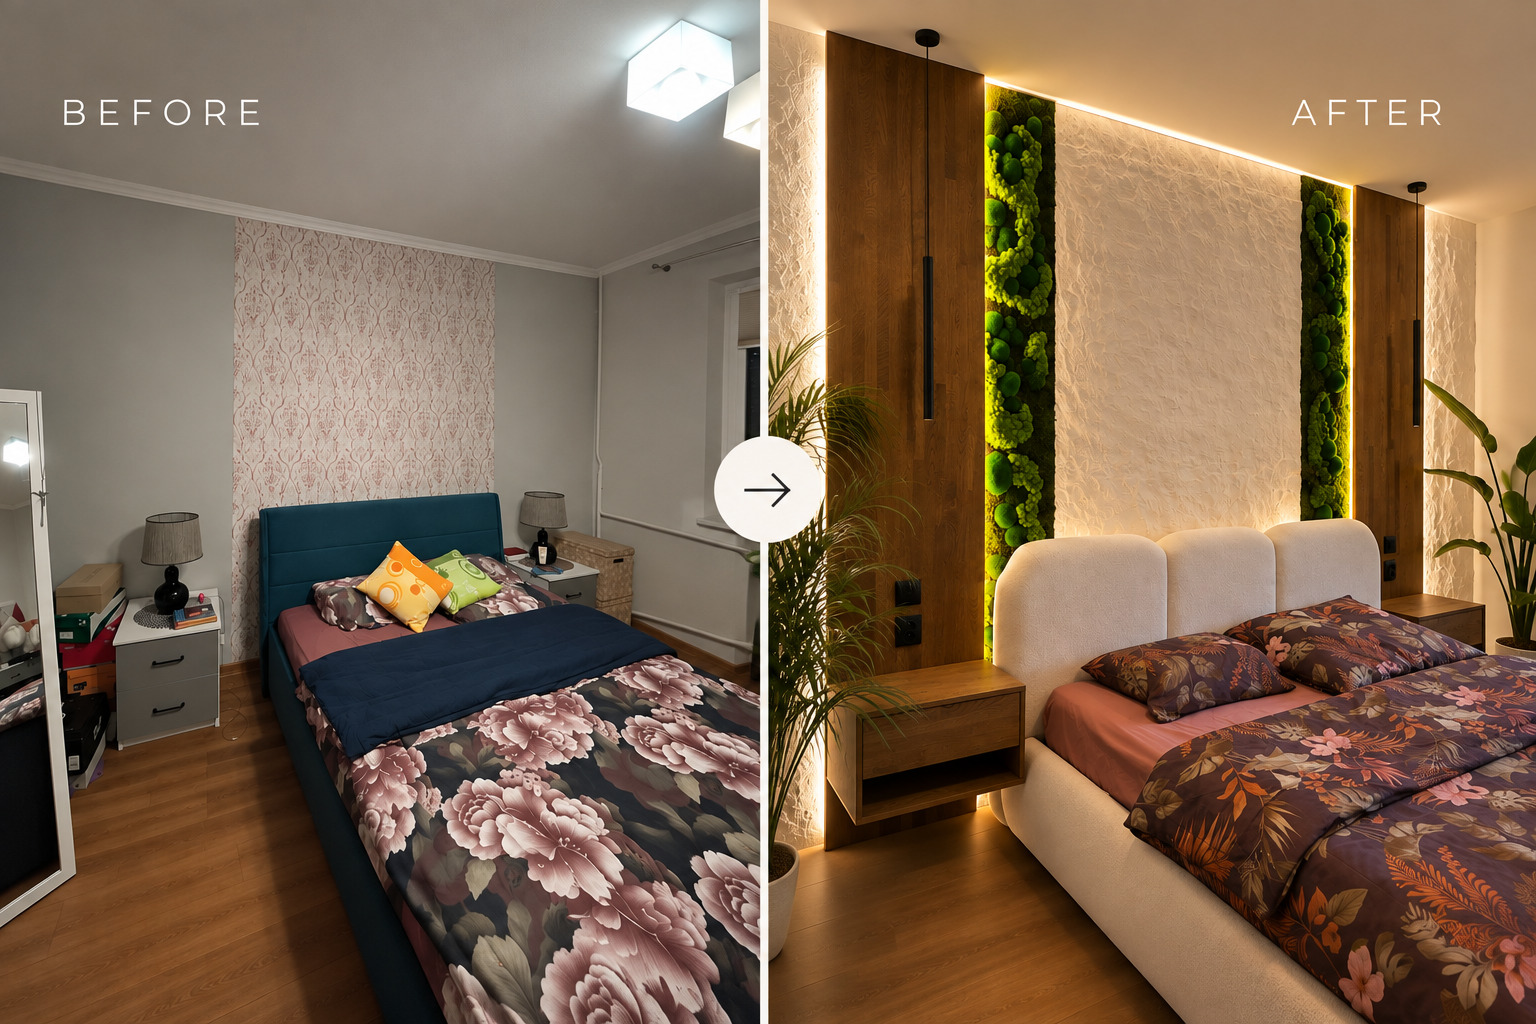
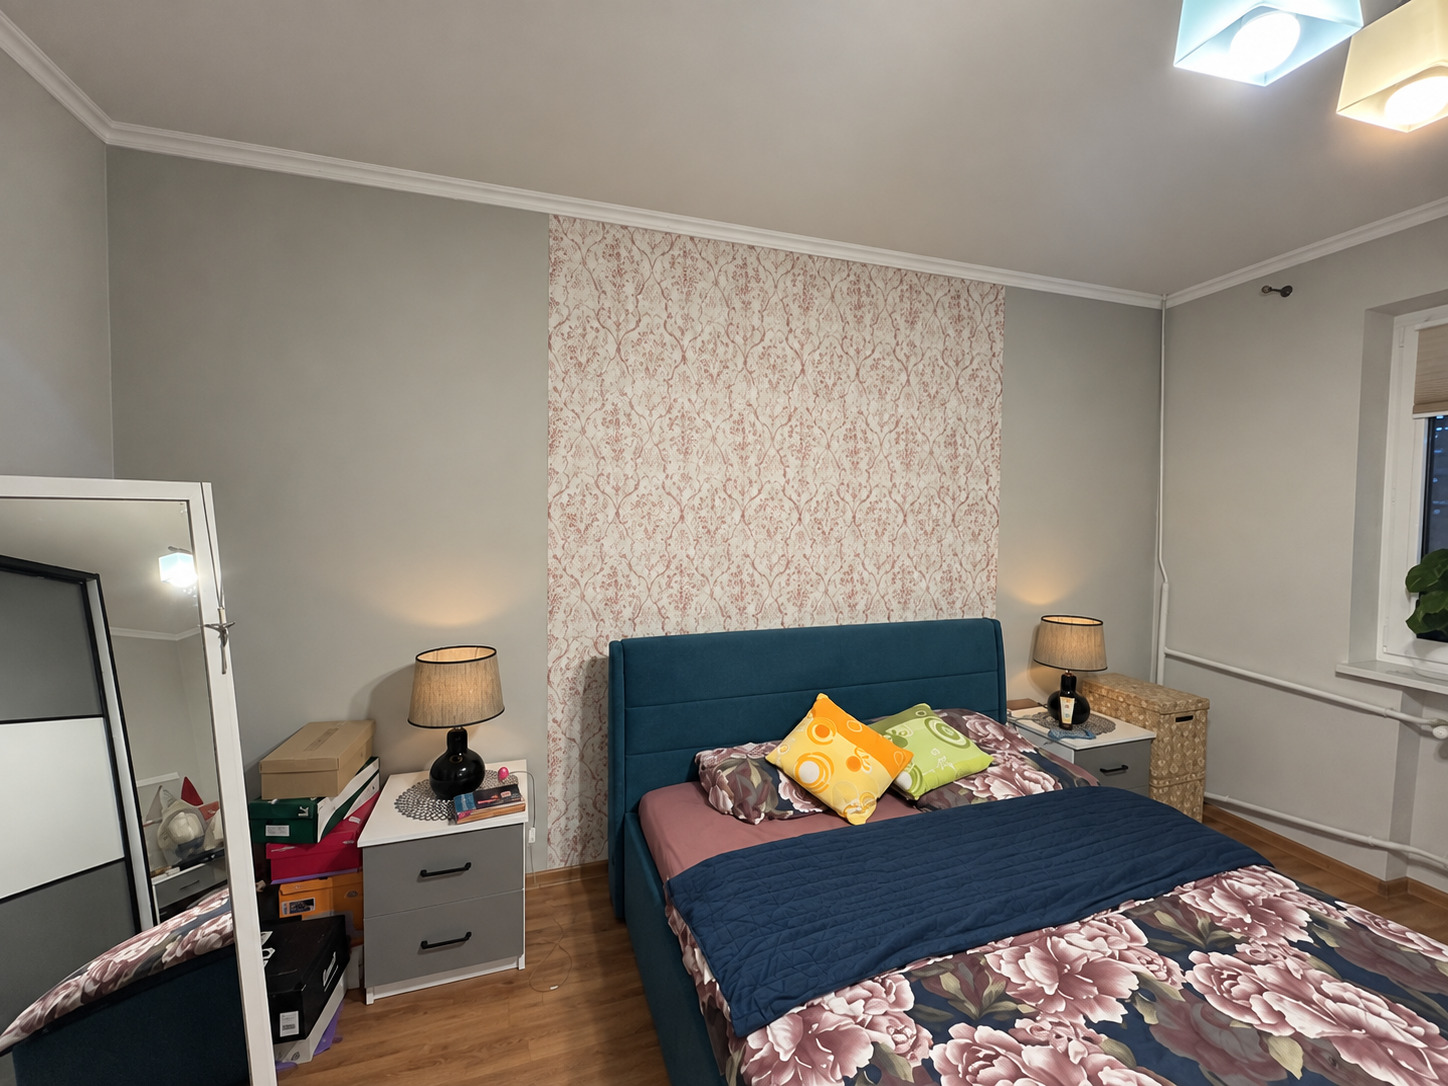
Bedroom Makeover: Before and After – What Has Changed the Most?
When we look at the before-and-after photos now, what makes the biggest impression isn’t any one specific element, but rather the transformation of the entire room.
The layout of the room hasn’t changed, after all. It’s still the same bedroom. What has changed, however, is practically everything that affects how it’s perceived—the wall behind the bed, the materials, the color scheme, the floor, the lighting, the bed, the nightstands, and how the storage space is used. What pleases us most, though, is that we didn’t find a ready-made bedroom design online and didn’t try to copy it exactly.
It all started with the idea of keeping the wood as a nod to the rest of the house. Then came hours spent on Pinterest and the lack of that one inspiration we were looking for. Then ChatGPT came along, followed by more attempts, and finally a visualization that showed us the way forward.
And then reality set in: taking measurements, looking for the right bed, choosing materials, planning the lighting, cutting the pieces to size, selecting the flooring, and designing the closet.
Not everything along the way went exactly as we’d planned. The panels turned out to be darker, we changed the color of the closet almost by accident, and we didn’t make some of our decisions until we could see the individual elements in person.
And I think that’s exactly why we’re most pleased with the final result. We’ve created an interior that isn’t just a copy of a photo we found on Pinterest, but one that’s tailored to this specific room, our needs, and what we simply like.
What would we do the same way again?
We would definitely start again by carefully planning the wall and the dimensions of all the elements. We would also keep the combination of oak with a small amount of moss and several types of lighting.
This transformation also showed us that not every decision has to be made right at the beginning. Sometimes it’s only after seeing the footage in person that we realize a solution different from the one originally planned is simply better.
And it wasn’t until the last piece was in place that we could look at the whole thing and say: now it’s exactly how we wanted it, and this bedroom is truly ours. It wasn’t designed to look like a photo from Pinterest. It wasn’t meant to look good just in a rendering. Above all, it was meant to suit us—what we like, how we use the room, and how we want to feel in it.
It wasn’t until the last closet was in place that we could take a look at everything together and say:
Now it’s exactly the way we wanted it to be.
FAQ – frequently asked questions
Finally, a few words from us
We, Ewelina and Piotr Solak, employees of Deerhorn, are telling this story—but above all, as two people who went through the entire renovation process themselves—from the initial idea, through hours of searching for inspiration, visualizations, the selection of materials and precise measurements, all the way to the moment when everything finally fell into place.
We aren’t architects or interior designers. We simply had an idea for a bedroom that would truly be our own, and step by step, we tried to bring it to life. Not every decision was obvious from the start, but the result exceeded our expectations.
If our story inspires even one person to create a space in their own way—or shows that sometimes it’s worth going beyond ready-made ideas—then it was worth sharing. 🙂